Most of my spare energy for the last few months has gone into designing BB-5M’s electronics and modeling his dome. It has been a slow process, as there’s just not much energy to go around these days. That is why it has taken this long to get around to writing up what I did to get everything up and running for Dragon Con this year.
About two weeks after the last post, I did some audio tests using Artie’s new amplifier and transducer (as well as the units I ordered for BB-5M). Seemed to work well, especially if the transducer was sitting on its own cardboard box. This acts as a resonator and increases the volume.
Shortly afterward, I designed a mount for the new amplifier, and yanked the old amp and speaker. Then I designed a printed ESC power switch panel to replace the old foamcore panel and added a switch to it that resets the Mega (Artie invariably requires at least one reset before the script will allow controllers to connect, which previously meant I had to snake my hand into Artie’s rat’s nest of wiring to press the Mega’s reset button).
After that, Artie’s core sat on my side work table for a month and a half while I did other things. I finally got tired of looking at it, so I pulled out the new amplifier panel and set to work again.
If the new amp had used a barrel plug like the old amp or the amp I originally got for BB-5M, then I could’ve just plugged it in. Unfortunately, this model uses screw terminals, so I had to disconnect the barrel cord I was using from my main power terminal and do some rewiring. I had to crimp on some spade or ring terminals big enough for my terminal block before I could do a proper test, but eventually I got the new Amp wired in, the transducer installed, and even took the time to boost Artie’s normal drive speed a bit in order to reduce the need to hit the speed booster as often. It can make him pop a wheelie if I forget to throttle back a bit first. I really should code up a less abrupt shift to the higher speed).
S. Raw Rats 77
As a side project for Artie Deco, I decided to give him a companion this time. There’s no official name, but I dubbed him “Captain Ernie ‘the Foss’ Jetson, leader of the 77th division of the S. Raw. Rats”. He was shown for only a few seconds in one shot of Hardware Wars. In the film, his helmet didn’t have gold trim, nor the little tip near his nose (which, thanks to Wombat, is now called “the squeaker grille”) … both were necessary due to the only source materials I could find being slightly different from what was used in the film. I need to paint Ernie’s eyes, but that’s just nitpicking at this point.

Time Crunch
It was approaching mid July. Time was growing short; there were only six weeks or so left until the convention. I knew by this point that I would not have his custom sphere ready, but I definitely needed to have the dome printed and in some semblance of working order. I really had to start cranking if I hoped to achieve that. My fallback plan for the droid was to run the new dome on the unmodified sphere for my original Spin Master BB-8, assuming that the stock body magnets could handle the extra weight. That was an open question — since I didn’t have anything printed or the electronics completely figured out, I had no idea what the final weight of the dome would actually be.
I hit some snags when I finally got the parts for regulating the voltage for BB-5M’s new amp, and it turned out to draw more current than the power bank I was using is capable of supplying (or to be more precise, more current than the protection circuit will allow). So I had to either redeisng the power system entirely, or order yet another amp and spend awhile waiting for that to arrive. I went with the latter. A few minutes into testing that new amp, it stopped working. I assume the transducer drew too much current for the amp (not the power bank) to handle.
Pipsqueak
As I said last post, even before BB-5M, I had started off with a project to build a 3/4 scale MSE-6 but I switched to a smaller MSE-4 droid when someone posted about one at Celebration Chicago, and uploaded the model on thingiverse. This wouldn’t be terribly complicated (just a new body on the right R/C car). I just need some time to work on it.
I bought the same car that had been used at Celebration, but my printer was having leveling induced issues with adhesion, and I wanted more “build” than “print” in the project, so I was going to make my own shell atop the same car instead of printing. I got a good start on the upper shell, but I wasn’t happy with the results of puttying the corners.
Eventually, I got my bed leveled and wound up printing a modified version of the shell after all (modified by removing the printed side circuit boards and top greebles, and adding a slot for an LED). My own side panels were attached magnetically, in the form of the original dome motherboard from the donor Spinmaster BB-8, and an old quad relay board I’d gotten from Aliexpress in a damaged state. In place of the top greebles, I had a magnetic eye stalk thing. This ultimately became P-1P (aka “Pip”), my rebel mouse droid.

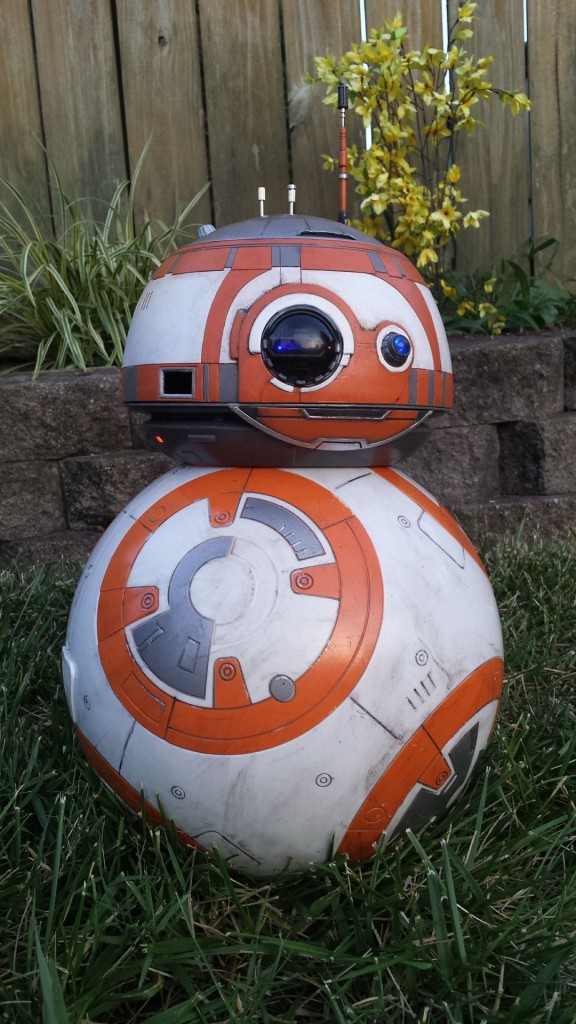
BB-5M
Once BB-5M’s dome CAD was far enough along, it came together considerably quicker than I thought it would. It took about two weeks (from July 17 to August 5th) to get the entire dome printed, prepped, and primed, and that’s with multiple gaps of several days where my work schedule prevented long-duration printing. The paint job and weathering were finished a week later.
The last steps involved getting everything working properly. I added Adafruit LED sequins to the neck section and dome, and I decided to use those in the dome as the process state indicator. I also need to work out the front and rear logics. I had all of the optical fiber needed, several multi-RGB LED boards, and a basic design to connect the two, but I had no programming for the LEDs yet.
The physical logic panels themselves were a bit of an issue, due to the numerous closely packed and small diameter holes required. As it happens, in mid-August I decided to treat myself and purchased the Elegoo Mars resin printer that everyone is hot for lately. It arrived the week before the convention — just in time, as my FDM printer started acting wonky, like the thermistor was about to fail. I had already finished the MSE-4 body and at the time, I was about to print mounts for my “custom” side panels. With my printer being untrustworthy, I managed to find some time to get my space somewhat rearranged and set up for the new printer.
Ultimately, setting up the Mars did use up all the time I could’ve spent on the RGB LED programming, but it was worth it. I was able to print the logic panels and also finish a few other necessary parts (P-1P’s speaker holder and little eye stalks, surrounds for BB-5M’s dome sequins, and a quick replacement for BB-5M’s busted main antenna mount that worked out very well).

In any case, Wombat had come across an alternate “temporary” solution for the Logics: a couple of motion activated LED flashers, of the sort that kids put on their shoelaces. I successfully adapted these to the front logics with optical fiber, and just attached one behind the rear logic directly. These worked pretty well, at least while the panels stayed attached (I hot-glued them in because I didn’t want to take the dome apart again so close to the con.
I also needed to work out a new power and audio setup, and settled on using a voltage converter to supply the Arduino nano from the power bank. The nano supplied all of the LEDs that were under Arduino control, and everything else came straight off the power bank.
For audio, in the end I settled on using a bluetooth speaker and a soundboard app on my phone. The speaker was only $9, and I wasn’t sure if it would be loud enough, but I could easily swap it and the sound board between the droids. When it was in BB-5M I was also able to set it up to constantly recharge itself from the power bank, so the normally short run time of 1 hour at max volume wasn’t an issue there. The dome’s run time with only the Arduino and LEDs was way more than I really needed (somewhere between 11 and 18 hours) so I wasn’t too concerned about the possible impact … I would already need to recharge the body after less than an hour of active driving, so charging the dome much less frequently than that wouldn’t be a big deal.
BB-5M’s dome ultimately came in at 876g, around 2.6 times as heavy as the original spin master BB-8 dome (334g).
I didn’t want to reuse existing droid sounds, so one of the other things I did before the convention was to give BB-5M his own custom sounds. I did this using Dexed (an emulator for the Yamaha DX-7 synthesizer).
I may do a full tutorial at some point, but the short version is that I mostly just fiddled with the settings to make some droid-like instruments. The Detuning settings are good for sounds that remind me of R5-D4, or sad sounds. The feedback settings can affect the naturalness, squawk, or squealiness of a sound. With the various “instruments” I’d created, I played around with the virtual keyboard a bunch … random keyboard notes to make beeping and booping phrases. I would rapidly go up the scale at the end of some phrases to make inquiring noises, or go down the scale to make sad noises.
I recorded all of this with Audacity, copied the best ones into individual sound files, and did some light processing on them (compression, normalization, maybe occasional pitch shifting), then I just stuck them in a sound board app on my phone.
One of the prints I ultimately did on my resin printer (but prototyped in FDM before that printer started misbehaving) was a small BB-5M head I could put on my Sphero BB-8. It works ok, though I could probably stand to cut out a little more weight. I had more trouble getting my tablet to talk to the droid than keeping the head on.

Finally, after nearly four months of work, I had an MSE-4, a BB unit that could switch between BB-8 and BB-5M, some custom sounds for BB-5M, and a BB-5M Sphero dome. Artie’s sound system no longer buzzed and was a little bit louder, he was a little faster, had a new friend, and it was definitely time for Dragon Con.
